Demo of the Disarmament Statute: Part Two
Demonstration of global search functionalities and creation of relationships between regulatory devices.
This post is part of a series of research for possible improvements in the follow-up of legislative proposals. Although our goal is to submit the project to the LABHacker (Civic Innovation Laboratory of the Chamber of Deputies), is currently an independent initiative. The information was collected from the website Open Data and the Chamber Portal and will be used here in accordance with its terms of use.
Following the demonstration of new ways of displaying the Disarmament Statute, we have prepared a second part of the essay. Here our initial goal is to explore the simultaneous search in multiple documents , what we'll call global search.
For this purpose we will use an application called Dynalist , but we could use others, for example: Workflowy , Checkvist or Moo.do . This option stems from the fact that we do not yet have this functionality incorporated into our platform, while it is already a standard behavior of free-to-use outliners.
Our differential is that we are able to generate, with just one click, the files with the properly structured standards. Thus, the files were generated in our environment and are only being displayed in a commercial use program. If our community confirms interest in this functionality, it will be developed for our platform, but today it is not yet available .
Well, with the caveat, let's go to the demonstration.
While searching a collection usually returns a list of documents, the behavior demonstrated in this post consists of bringing the relevant documents already open and filtered. Such a filter highlights the display of fragments in which the search returns a positive result . In addition, to give a little context, the hyearquically superior fragments are also displayed, which work as a kind of "crumbs" to know the path to the destination fragment.
In the first part of the demonstration, this behavior and its advantages have already been commented on. But only now have we demonstrated how it is possible to do this with several documents simultaneously. It's easier to see it at work than to explain:

In the left sidebar is the relevant collection. In this case, a PL, a law and the Penal Code were selected. When searching for the word "shot", the system reveals that the word is both present in the law and in the PL. The difference is that, in the current law, there is a prohibition of shooting by hunters for subsistence who give another use to their weapon . In the PL, the word occurs to register that The collector cannot fire shots .
In turn, it is possible to note that, both in the law and in the PL, the firing of a firearm continues to be provided for as a crime. In our view, this is the ideal way to perform quick queries in multiple documents, because The normative hierarchy itself already helps a lot in the comparison . After all, right from the start, you can see if the comparison is in the context of "crimes and penalties" or "possession" or "acquisition and registration".
This immediate situational awareness saves the interpreter a lot of mental burden.
A few more examples help illustrate the functionality. Let's see how the system behaves with the search for "omission" and then for "firearm":
Other information systems would require many more interactions to reach the same degree of evidence. Just the fact that there is no pagination (comings and goings) already helps a lot in the manipulation of the content. In this sense, the experience is similar to what is expected from Google: the immediate solution of the issue. On the other hand, we are not averse to trying a new search argument, as this is the practice we already have in other tools. We want the answer to always be on the first page . At least that's how I personally do my searches.
This way we prove that it is possible to search and read several documents on the same screen, without changing pages.
The alternative so far, for an investigation like this, would be to set up an Excel spreadsheet, which has no search. People were used to copying and pasting text into programs designed to do mathematical operations , which is not a rational use. We have seen, more than once, huge normative texts pasted on a spreadsheet, so that the reader would have some notion about the parallel of the fragments in various norms.
And that brings us to the second goal , consisting not only of being guided by the normative structure embedded in the law, but also of being able to Create relationships between fragments of different documents . In other words, how do you create relationships without getting stuck in the metaphor of the Excel line?
Our proposal is to make it possible for one document to be consulted within the other, opening a window for creating the link manually. In this way, navigation becomes much more fluid:
We need to recognize, however, that the experience is still somewhat truncated, because it really is something very complex: navigating within a structured text, creating relationships with points from another structured text. It's not an easy task, especially in the case of creating "inline" references. Perhaps the server responsible for creating these bonds should be an expert.
For the reader, however, the experience seems pleasant, because what he notices is only a link within the text, which refers him to a certain point in another text, with which he has a relationship. For example, Article 46 of the PL is related to Arts. 12 and 14 of the Old Law:

In other words, creating text structured in this way has always been difficult. Now it has become possible, despite the difficulty. The advantage is that, once created, the reader will find it very easy to see relationships between points of normative documents that were previously hidden.
This can be useful, for example, in organizing and voting on amendments , because it is undoubtedly a moment in which two texts need to be confronted clearly. On the other hand, it can be useful for those who research and compare normative texts or, who knows, for those who draft a text proposal.
In any case, for the purpose of proof of concept, it seems to be demonstrated that it is possible to consult several texts (or several versions of the same text) with a very intuitive and fast search. Currently, as far as we know, there is no tool that facilitates the comparison of texts of this nature.
Be seen as an advocate
How to keep the community informed about your activities
Comparison of tools to manage small ads and keep your users informed (and happy).
I have already reported here my search for a bulletin board for the blog. In the end, I ended up realizing that I also needed a way to interact with my communities, so it was desirable to give users a voice. Thus, I needed the famous forum, which is why I ended up choosing the Gitter .
 Henrique Costa
However, there is a similar demand, boiled down to the need for disclosure without public interaction with users. I would name such use "microblog", if it did not already belong to another type of tool. This is what is known, in the developer world, as "changelog". Let's see what are the main tools in this market.
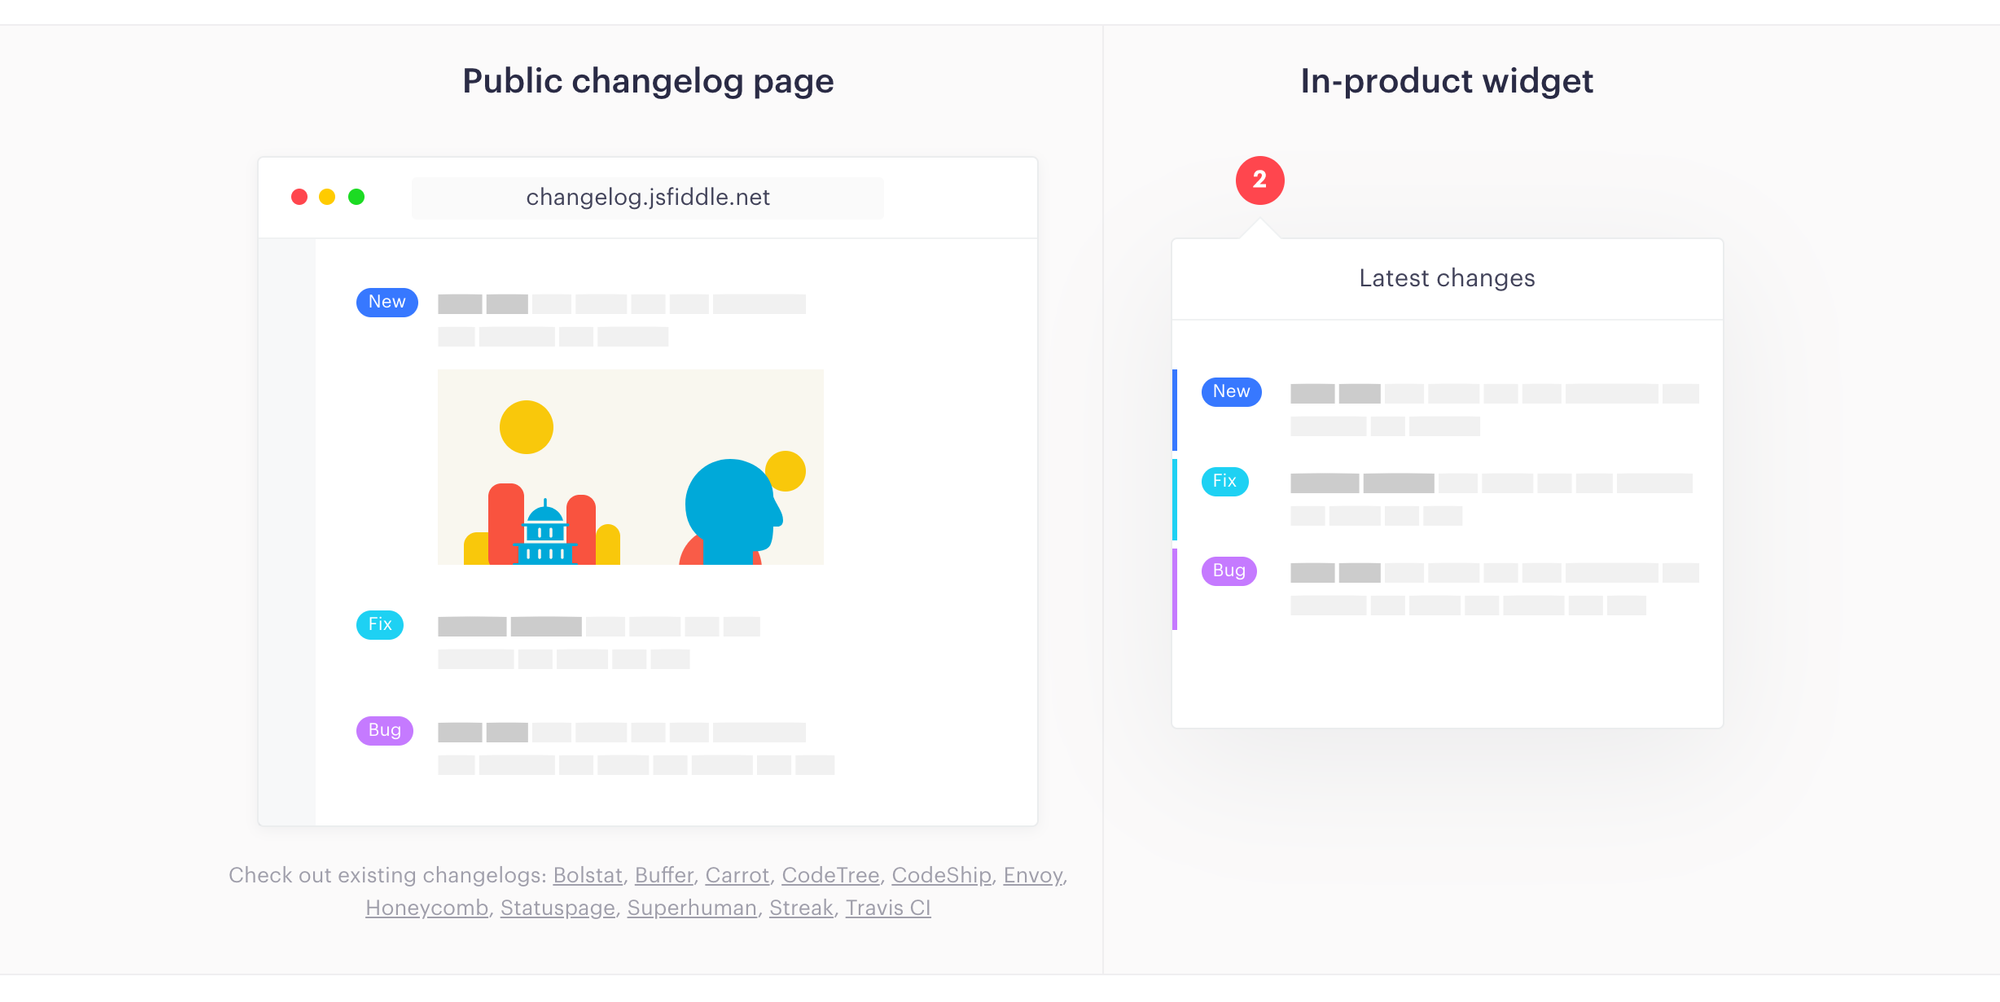
Or Headway It is a very simple changelog tool, which perfectly meets the demand for spreading news about your product (or whatever you most want to promote). The app provides options for Publish the changelog to a standalone page or directly to a widget , displayed within your blog or app.
It's what I would call a "root experience" For two reasons: the post is written in markdown and the customization of the widget is limited. The paid plan (USD 29/month) also offers: whitelabel, publication on your domain, integrations, among other features. So, overall, the free plan is more than enough to fulfill the mission of publicizing your activities.
A good alternative to Headway is Announcekit , which has many more customizations in the widget, in addition to being aimed at a wider audience. While changelog tools are originally geared toward developers, there are adaptations to serve marketing and product teams.
This is precisely the case with Announcekit, that included feedback and email notification functionalities in its solution . In terms of price, Annoucekit has a similar plan to Headway for a better price ($19/month). But to use the marketing tools, you need to choose a more expensive plan (starting at USD 49/month). That is, it is cheap for developers and expensive for marketers.

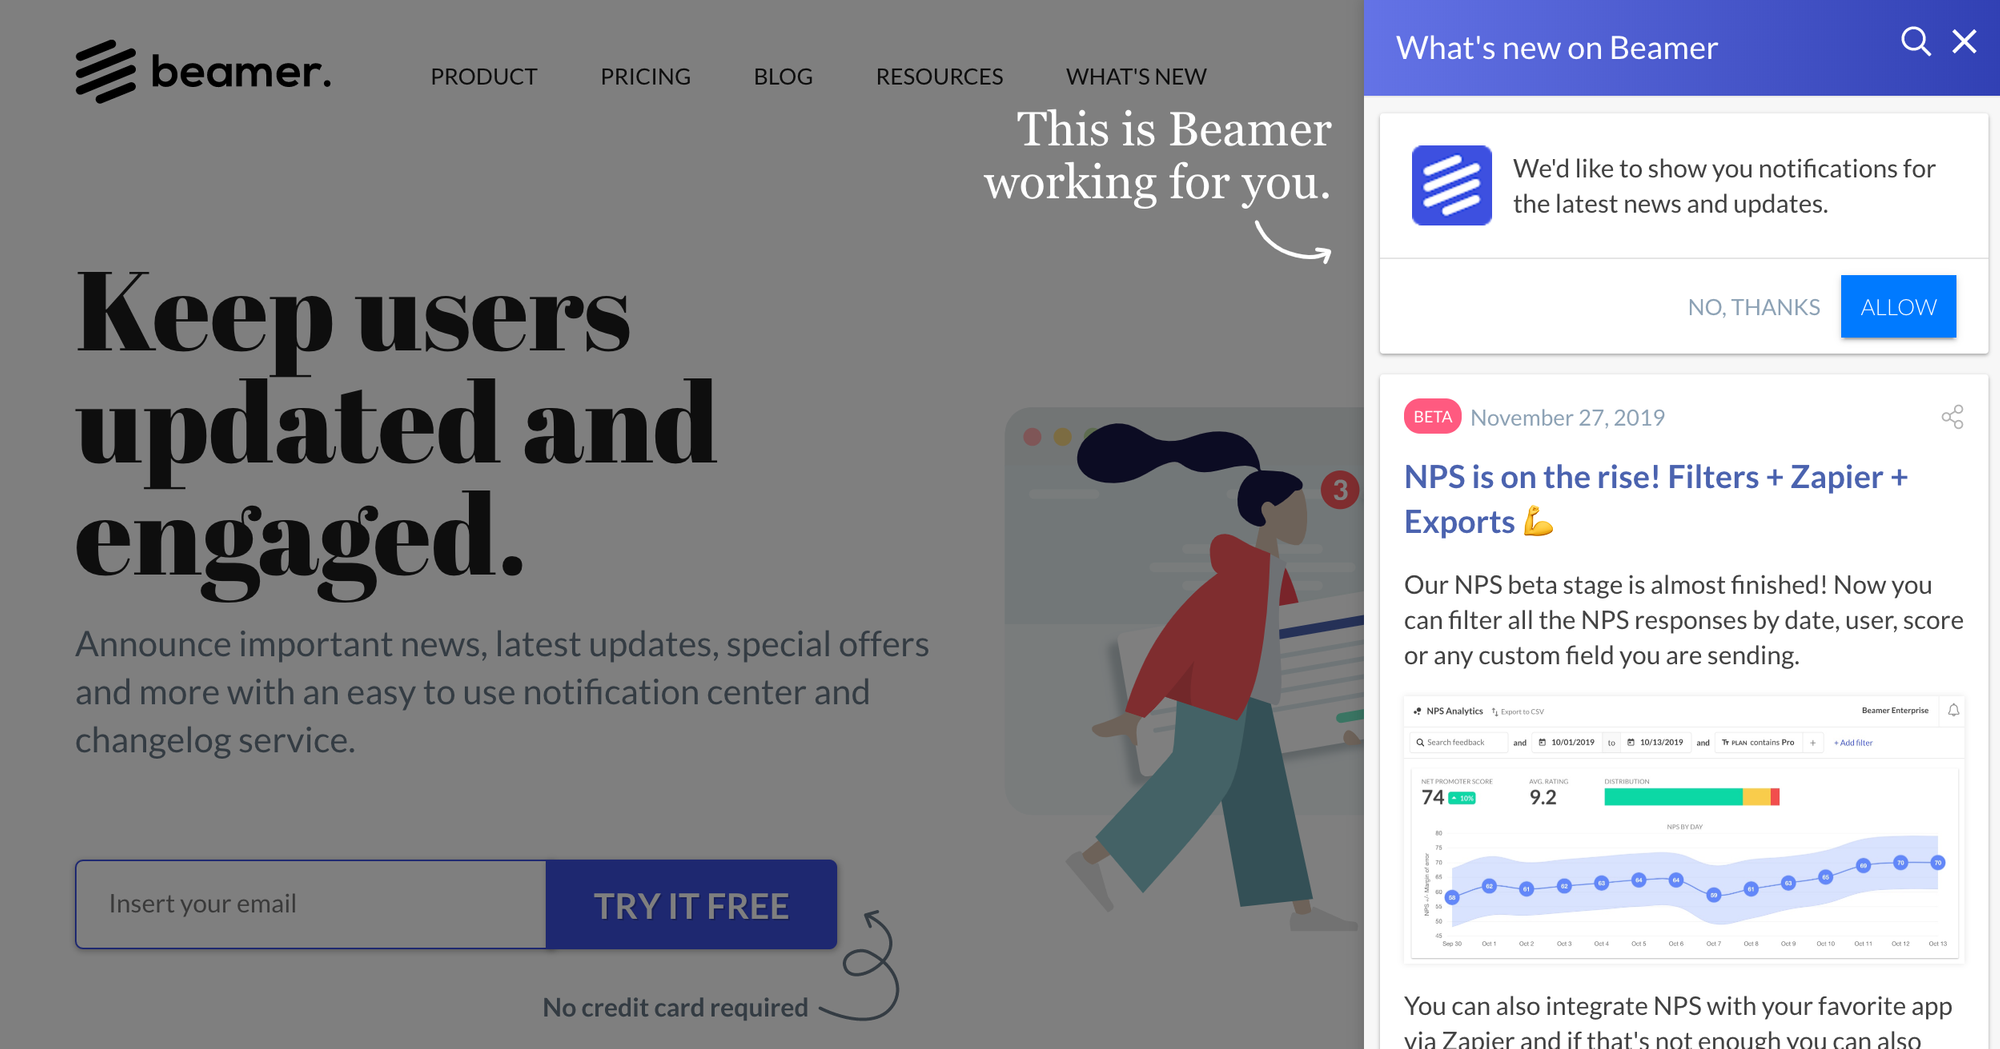
From what I could see, Announcekit is competing directly with Beamer . The biggest difference I found was that Beamer doesn't offer an affordable starter plan, but only charges in the most expensive ranges, with features very similar to those of Announcekit. In fact, even visually the competitors are very similar.
Another competitor to be mentioned is the Noticeable . Since it seems to be the only one that limits the free plan to one project, I haven't delved into the tool. Finally, there is the ReleaseNotes , which has a business model based on the number of subscribers to your changelog. Since it starts at $14/month, I also didn't thoroughly evaluate the app.
That is Competition has organized itself into an increasing line of complexity and price , in the following order: changelog, announcements (releases and announcements in general), notification center, user segmentation, feedback, push notifications, design customization, and integrations with marketing tools.
Personally, I think that if you don't need anything too complicated, Headway is a good option for small ads . But, if you're looking to expand your fulfillment of marketing demands, Announcekit seems to be the most flexible, as it has the most price ranges and features. That way, you'll only pay for what's important, when and if the need arises.
How to share videos on your blog in an (almost) professional way
Second part of the text on how to capture and share videos on your blog.
In the previous post, I evaluated some options to capture and share videos in a simple way on your blog. You might want to take a look at it before jumping into the current discussion:
Henrique Costa 
Essentially, the options that make video sharing simple are made up of chaining each of the following tasks: Capture, edit, store, and share . The apps I dealt with in the last post are a kind of package of all these functions. However, each task can be handled separately and, as far as storage is concerned, there are several possibilities.
Several services offer cloud space and that is why Each of us already has abundant "disk space", distributed across several accounts . The fact is that today storage is the most abundant and cheapest part, although it is a little more difficult to find an interface with a good experience so that the user can take advantage of what they already have.
Given this, I will not look here for the best storage solution, but the best management experience for it. If you're a Mac user, that's where the Dropshare , which is a small paid app ($25.99). Your goal is to connect the menu bar with your preferred cloud storage account. Simply drag the file to be uploaded to the cloud to the Dropshare shortcut and then copy the generated link in the cloud of your choice.

If you prefer to use Dropshare's own cloud, the service offers a free monthly plan of 1 GB of data transfer, limited to storage of 512 MB.
Dropshare is therefore a Cloud space power interface provided by various sources , including the possibility of using Dropshare's own cloud. Generally, the app competes with companies that are in the field of file sharing. But for our use case, what really matters is storage, since the display of the content will happen through the blog - and not, for example, by sending the link by email.

It is true that Dropshare has numerous competitors in the market and the Sweet Setup published a great comparison on the subject. But there is a detail, consistent in that, for the publication of the captured video on the blog, you will need the link to the file, which will end with the extension ".mp4". This is the link to the file displayed in a raw form , fully transparent so that it can be presented as an "embed". It is nothing more than a window, within your blog, through which the user will see the captured file.
Unfortunately, not all providers offer the link in this format and it is essential so that you can display the video directly on your blog without interference. For this you have a few options. If you choose Google Drive, the generated link gives you the option to copy the iframe, which is the line of code to be inserted into the blog. In other words, Google does not prevent the dissemination of files hosted on its network and even facilitates this task, by publishing the code that facilitates integration with the blog (which is precisely the embed).
If you choose Backblaze, in the free plan, the generated link gives you the option to copy the address of the file so that you can prepare the link yourself for insertion in the blog. It is either possible to search for the "direct link" from Dropshare itself, or to open the "standard link" generated by Dropshare . In the latter case, when clicking on the video, the option to copy the address of the file will be displayed, a path that is displayed in the following video:
If you're a Windows user (and don't have Dropshare at your disposal), I imagine that the Cyberduck (R$ 89.90) also solve, as it has a similar proposal for managing cloud space from several providers. To make the experience even more fluid, Mountain Duck (R$ 149.90) offers a number of advantages, at a higher price.
But At this point, we are already moving far away from the problem to be solved , since such tools are actually aimed at a more technical use. For a more detailed comparison of FTP clients, see the blog post BinaryNighsts .
Resuming the thread, we were looking for a customer to easily upload files to the cloud.
We came up with Dropshare as a solution to improve the experience of uploading files to the cloud, leaving the user's choice of their favorite storage service. Then, we considered FTP clients, which are professional solutions precisely for this type of demand. The tendency is for these solutions to be paid.
But, if budget is too tight and you want to forgo some convenience, there are even more sophisticated service providers that don't charge anything to meet the needs of an "average blogger." These are companies whose mission is to distribute content through a complex network of servers, in order to optimize the speed and quality of this delivery.
Here's an example of video served via Cloudinary , in which the sophistication in the treatment of images is demonstrated, which includes transformation, processing, optimization and distribution across a complex network of servers to improve the performance of your application:
A competitor to Cloudinary, also focused on storage, is the Imagekit , whose free plan offers 20 GB of bandwidth per month. This type of company allows itself to offer free plans for data traffic with generous franchises, because the service they provide is not quite that, but a refinement in the way they transform and distribute such data.
In conclusion, it is clear that we are comparing completely different solutions, as the evaluation started with applications that do from capture to hosting, and in the end generic solutions for cloud file management are being compared. They are completely different problems, although the applications mentioned can be used for the same purpose .
I could also conclude in another way: since Loom is exactly what you need to capture and distribute videos in an agile way, they are sure to build a business model that will make you pay for it. If you seek to stay on the sidelines of the business model, using the service for free, you will need to move a little away from the purpose for which the software was developed. The further you go, the cheaper - and more complex - the solution will become.
This seems to be a fairly universal and predictable rule. In my case, I chose to stick with Loom for disposable videos, CloudApp for occasional use (as the free plan is very limited), and Dropshare as the ultimate solution. Anyway For me, the most important thing is a seamless experience when sending files to the cloud , which is precisely the problem that Dropshare sets out to solve.
How to Capture and Share Videos on Your Blog Easily
First part of the text on how to capture and share videos on your blog.
There are several video formats, with different purposes. For my use, I usually share screenshots (screen record), because My goal is to produce demo videos or tutorials . This requires a solution that captures the screen (and sometimes also the webcam), as well as has minimal video editing capabilities. So I mean that if you are looking for a robust video editor, this kind of solution is not suitable.
In addition, when it comes to screen capture, it is very convenient for the application to provide a video hosting and distribution service. It is also desirable, although not essential, that it offers collaboration with your colleagues and work and interaction with the public. And finally, for my need, it is very important that the distribution of the video has a professional look, without too many ads and that it works in harmony with the design of my blog.
As you can see, in the journey of solving this problem, there is a production cycle that goes from capture to sharing. And the type of application we are evaluating is precisely the one that, preferably, covers all these phases. Like this What would be the best way to produce and share this type of video?
For short videos, you can use the free version of the CloudApp . But if your video is longer than 5 minutes, you'll need to subscribe to a paid plan. Ironically, CloudApp's promotional video is not hosted on its servers, but on YouTube. This is a symptom that, although CloudApp serves for content distribution, this is not its primary purpose.
According to CloudApp's proposal, they seek to solve communication problems of designers, developers, executives, marketers, as well as sales and support teams. Your promotional video illustrates this type of use case, demonstrating communication between two people on the same team, discussing a way to enhance the display of a digital photo.
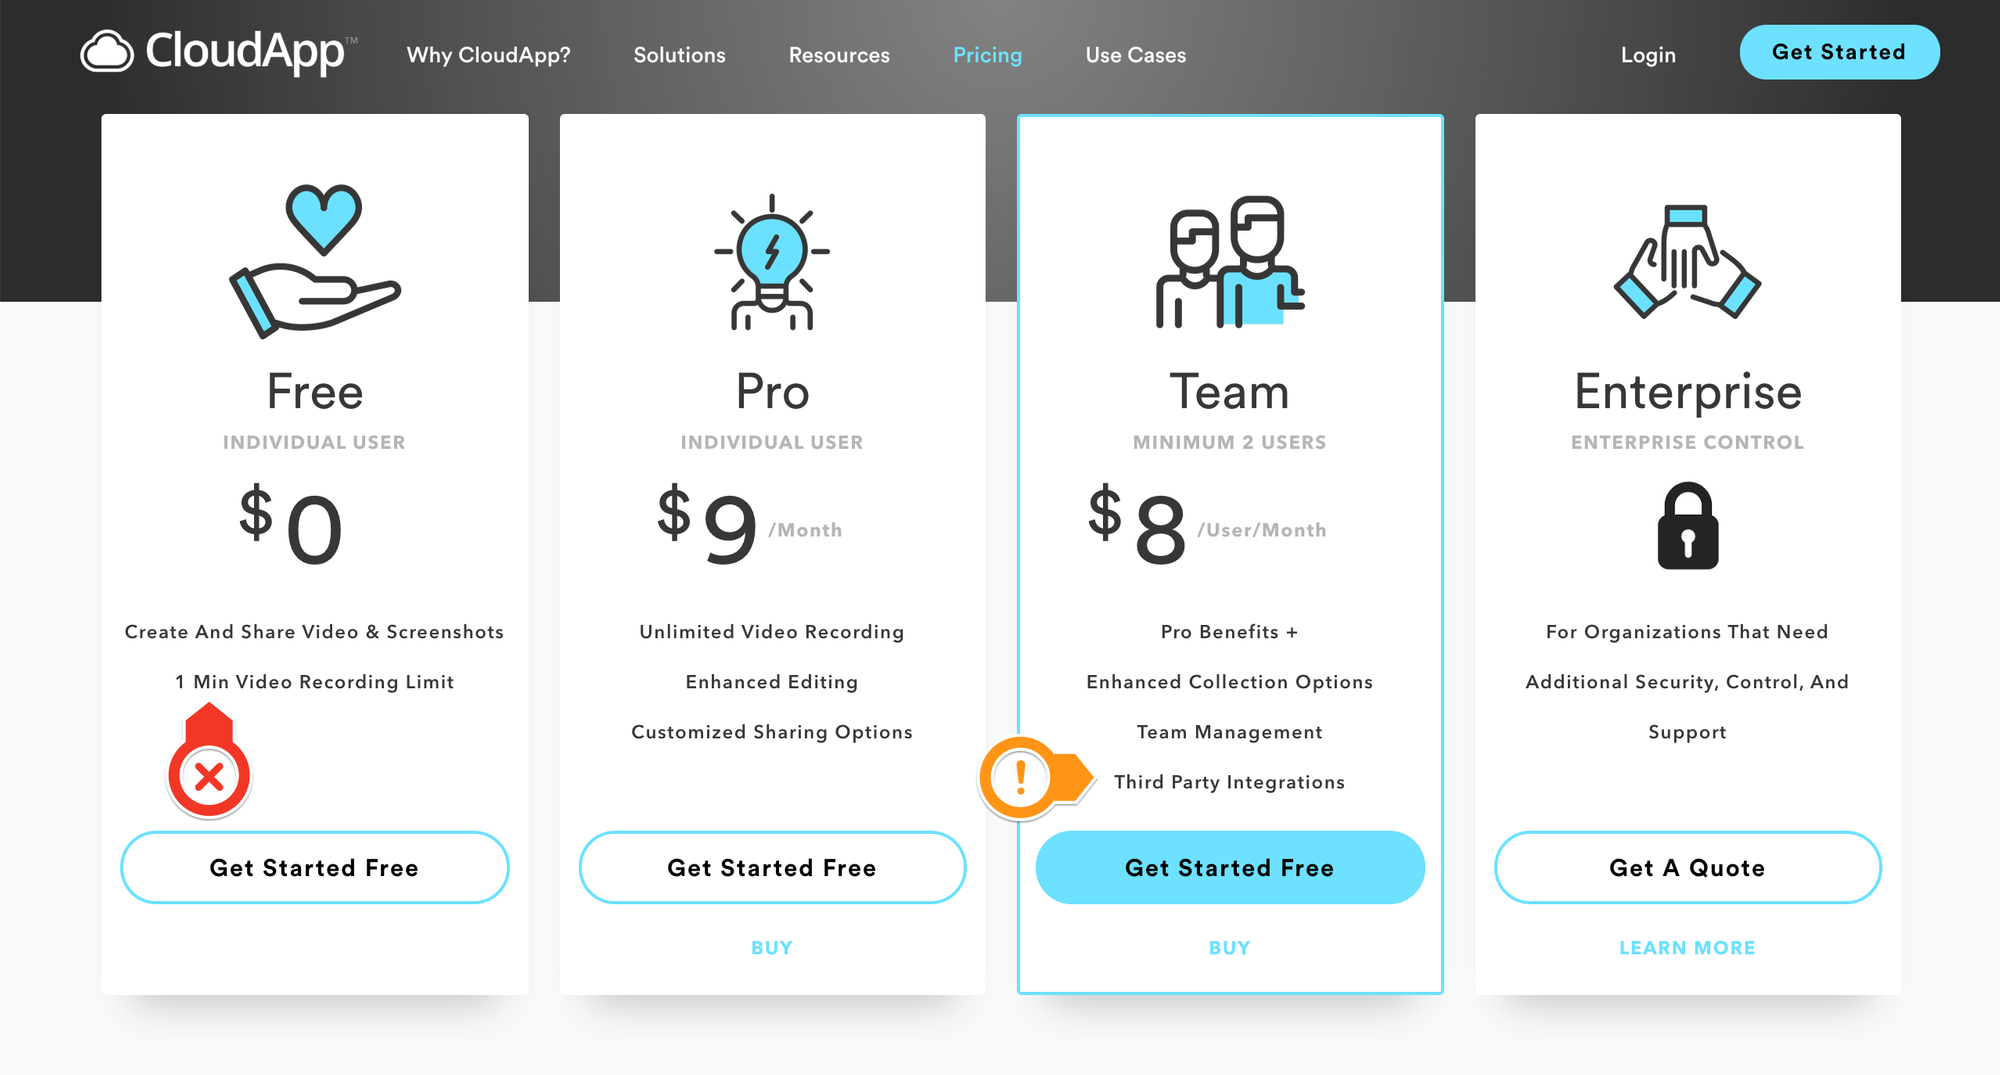
Basically, what the app aims to do is to facilitate visual communication, integrating various media into the communication channels that the team already uses . In other words, CloudApp was not designed to be the "engine room" of your blog, although it has features that allow you to perform this function. The prices and features offered confirm this, as CloudApp seems to have its audience paid precisely in the teams that want to integrate, for greater productivity, the management of the captured content with the sales or support software they already use.
Another advantage of CloudApp is that it allows you to share, in addition to videos, also GIFs and images. It also offers annotations of captures within the application itself, making CloudApp a very complete solution. Another advantage is that, even on the free plan, CloudApp's player is discreet and integrates very well with any blog.
While CloudApp has a complex pricing model based on the length of the videos, the customization of the player so that it becomes fully compatible with your blog, the type of integration available, and the number of captures (up to 25 per month), CloudApp Loom It has a different and simpler approach. While Loom doesn't limit the length of each video on the free plan, it archives your oldest videos, allowing you to only watch the 25 most recent videos.
This coincidence is even curious: while CloudApp only allows 25 new captures per month, Loom only allows access to the 25 most recent captures.
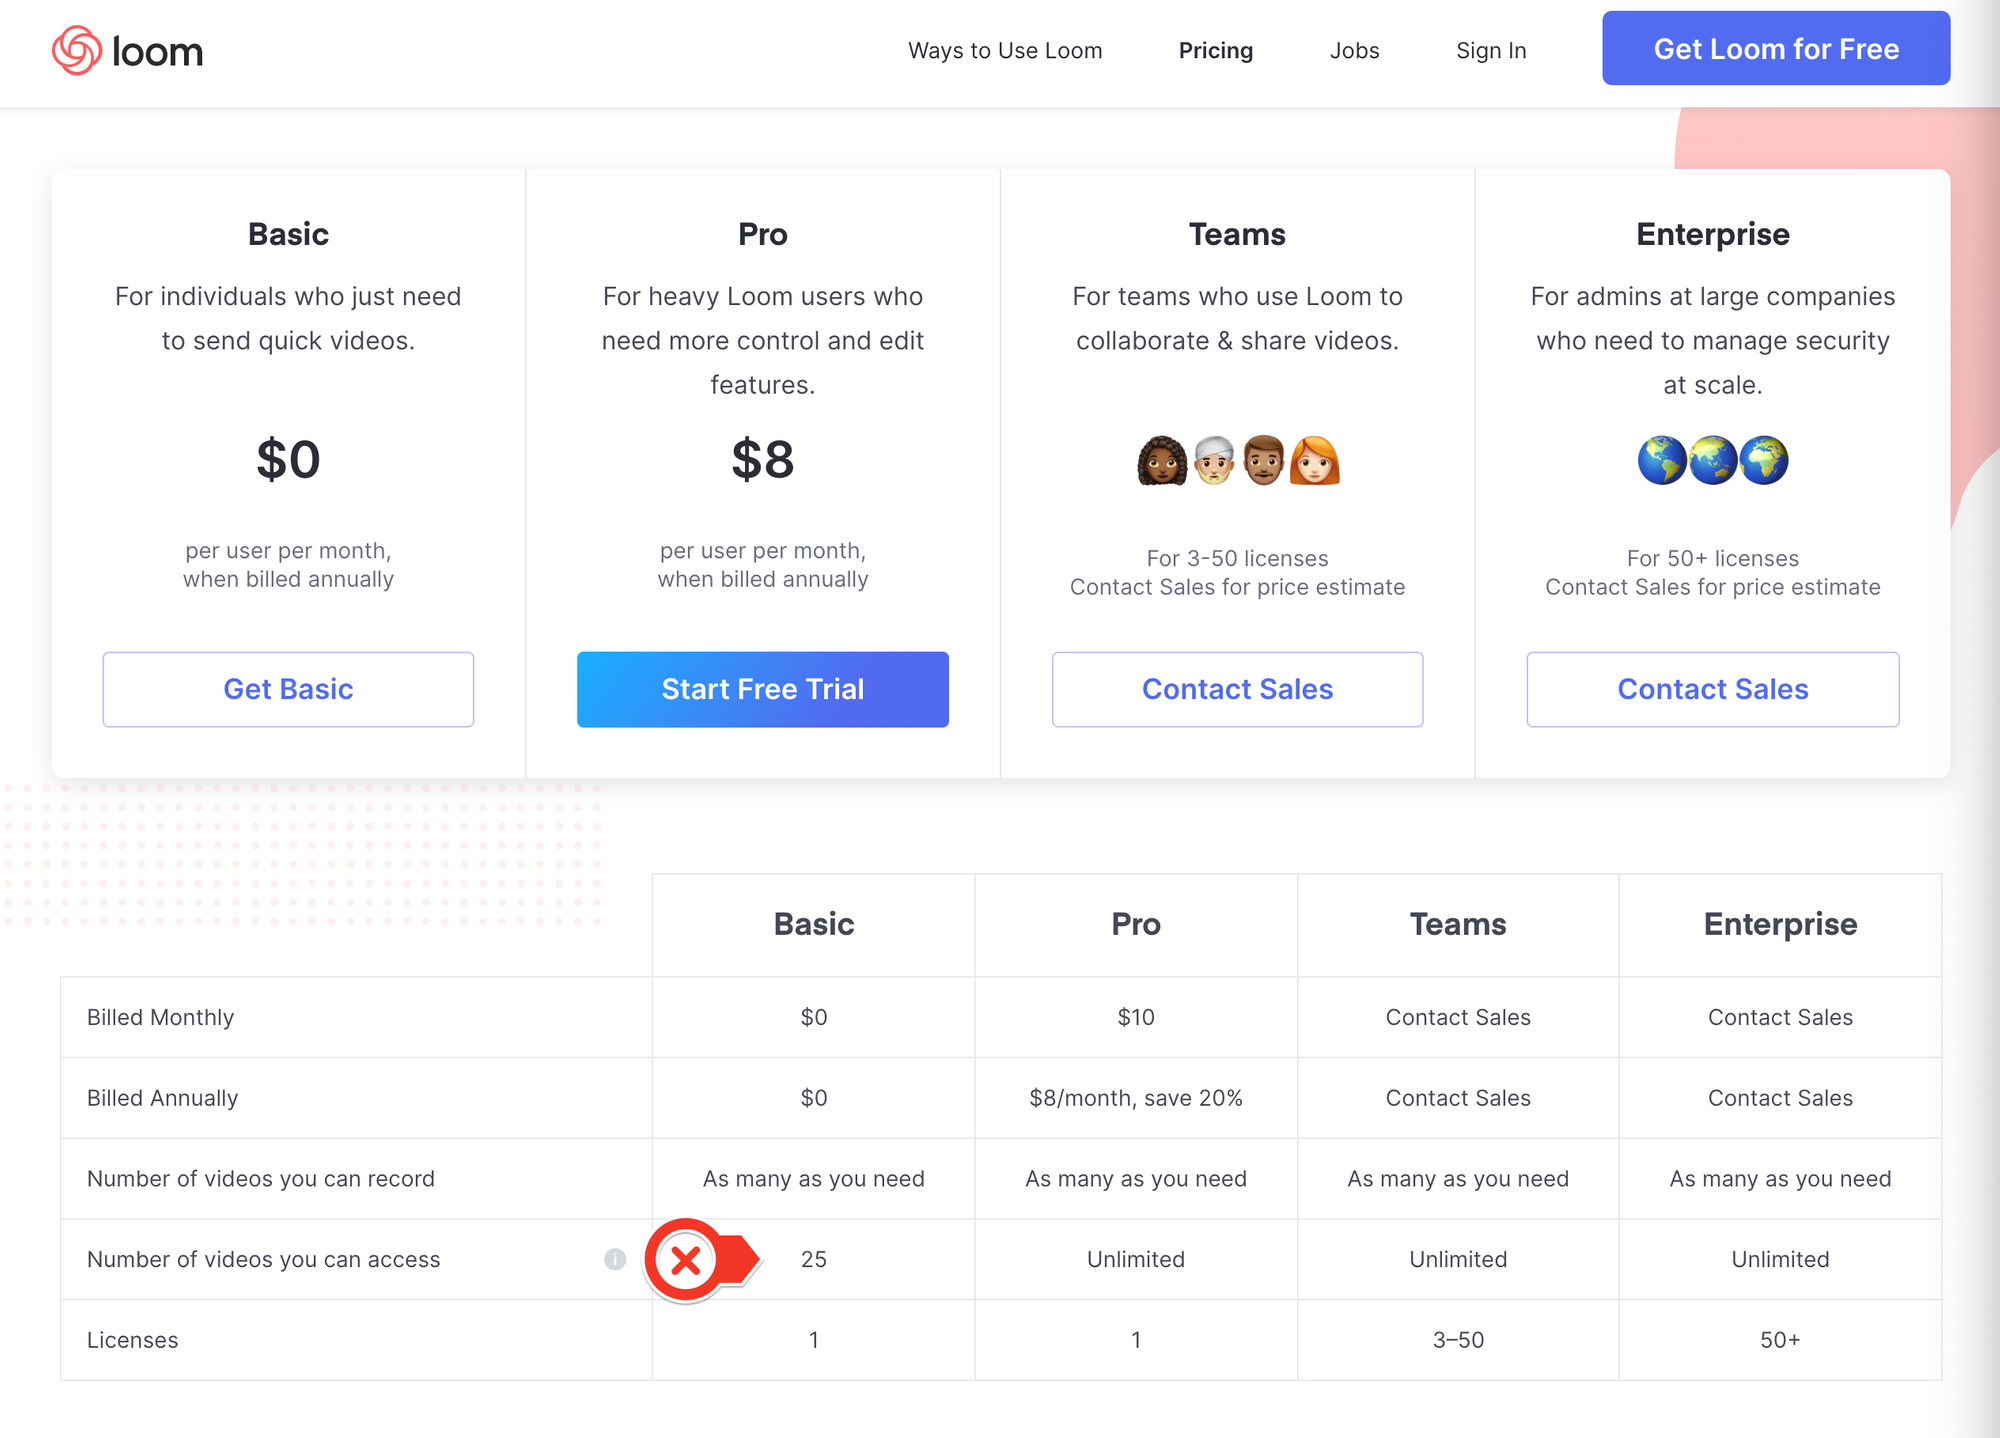
That makes Loom, in my case, an option for disposable videos . Whenever I need to send someone a video that is very fast and doesn't need to be available for a long time, Loom is the first alternative, as this is fully compatible with the one offered in the free plan.
So, if the video needs to be available for a long period of time, I choose to publish it to CloudApp. In fact, the amateur production of Loom's videos itself shows well the company's proposal, which is to make videos with agility, without focusing on refining the production. And here is no criticism, because The company's honest stance for the pursuit of agility, not refinement, is fully compatible with the problem it sets out to solve .
CloudApp and Loom aren't the only options, as you can see in this comparative prepared by the Zapier team. But, even though the comparison is quite complete, I think it is worth adding other possibilities - less obvious - and justify the reasons why they are (or are not) in my preference.
In fact, several people have commented to me that they like the Soapbox , developed by Wistia. One small problem is that Soapbox requires you to appear in the webcam video as well, but we don't always want that. It is true that later you can hide the webcam capture, but You won't be able to easily integrate video into your blog . And for my use, that's a huge problem.
Such limitations make total sense if we evaluate the global strategy of the Wistia , which seems to consider Soapbox as a promotional product. In my view, Soapbox does not exist exactly to generate revenue, but to generate customers for its corporate solutions, which are much more expensive and robust.
Another possibility is to take the screenshot with any software, possibly a free application that already comes on your computer, then distribute the video to the most popular channels: YouTube or Vimeo . In fact, this would even be the expected behavior of someone who has a personal blog. Any solution that deviates from this implies bringing a complexity that the author needs to face.
In my opinion, the recommendations that appear at the end of the video on YouTube and Vimeo induce the audience to leave the blog and compromise the experience as a whole. After all, that's what ads are for. If you want to avoid this noise (which can be represented by a cute puppy as a suggestion at the end of the video 🐶), you can customize the Vimeo player, as long as you are on the paid plan.
If you just want to distribute your video, without any commenting or social media tools, the paid account of the Streamable It's a possibility. The tool is exactly for this and is very easy to use. However, if your account is free, it's good to remember that ads will be posted on your video. Personally, I didn't have a good experience with Streamable, as the video definition was lower than ideal for my case.
This makes me assume that a good part of Streamable's audience is not only people who want to distribute their videos, but who wanted to do so without worrying about the restrictions (e.g., copyright) typical of the big platforms. After all, you don't need to have a Streamable account to post your video, so your post can be anonymous.
Here ends the first part of this evaluation , which will continue soon. In the next step, I will compare the options more focused on cloud file management, which requires the use of at least two applications: one to capture and one to share the captured content.
Henrique Costa 
My list of text editors
List of the text editors I like the most, separated by complexity and price.
Well, before you get to know communities like Research Hacking (organized by Nicholas Cifuentes-Goodbody ), I might even be ashamed of my list of text editors.
But now, meeting a number of people who are several levels above me in terms of organization, I come to open my heart and tell you which text editors I have used. As you can see, there are several. 😇
If you are not familiar with the proposal of editors in markdown, I recommend a short video, in which the aforementioned Cifuentes-Goodbody demonstrates the advantages of this type of writing. I agree with this approach and so whenever I can, I choose to write in markdown.
From the simplest to the most complex, I use as an editor the Sublime , especially when I'm going to edit files in .txt. I know, however, that Sublime has several very advanced features, especially for those who write in computer code.
As my use is limited on this front, I prefer to stick with Sublime just to have one less editor, since my list is large and it is a great option for simple tasks as well. It's a very versatile editor, in which you don't feel the weight of many features , as they are hidden in the interface, which is quite clean.
From a business model perspective, you are not required to pay for Sublime, as there is a free version with an indefinite trial. The program just politely warns you from time to time that, if you want, you can buy a license.

To a slightly more complex degree, I use the Bear . I see Bear as a notes app that has a great information retrieval system , especially through your nested hashtags. That's right: you can create a structured hashtag tree and browse your notes by subject.
I have already explained, in the past, how I organize in Bear the questions I apply in my tests. It really is a very useful application that already has a lot of features in its free version. The main paid feature is the synchronization of notes between different devices, which is something that I personally find dispensable.
Moving on to editors of more structured information, I use the XMind . In fact, it is not a text editor, but mind maps. So it is not exactly possible to compare it with the other editors. Its free version is quite robust and, for my use, it is quite sufficient.
Finally, as for XMind, I don't miss the paid version as its only unique functionality is the mind map exporter in .pdf and image formats. The free version generates the same export files but with a watermark.
In the field of structured text editors, the Dynalist It's my option. It is an outline editor, that is, structured lists . The search tool is amazing and you can see that the app is constantly evolving.
Like the other apps mentioned, Dynalist has a very generous free plan and the only features that seem to be missing are bookmarking and the hashtag panel. This does not hinder the use of the free version, no doubt.
Moving on to longer text editors, I use the iA Writer . It's a very basic markdown editor, but extremely well finished . It is a paid software that is worth every penny, USD 29.90 for the Mac version and USD 19.90 for Windows. If you are interested, the developer has published a Very complete comparison - and partial - considering Word to Microsoft:
As iA Writer is mandatorily paid, I leave you with a free alternative that basically meets the same demand: Typora . By the way, Typora is a very original editor and has great support for tables in markdown. But this subject is so complex that it would require a new post.
The last two editors are also paid and serve for very complex projects, for example, for writing a book.
Still in the field of markdown writing, I use the Ulysses . If you decide to subscribe to Ulysses (that is, the developer no longer works selling licenses), you will have to pay R$ 14.90 per month. Personally, I find the value expensive and I continue to use an old version, which I bought before the subscription model was imposed. Nevertheless no one can fail to recognize the quality of Ulysses .
And, in the field of editors with inline formatting in the text (i.e., rich text format), the editor of my choice is the Scrivener . Its Mac version costs R$ 184, while the Window version costs R$ 169. In my view, because I don't work with markdown, Scriver is the natural evolution for users unhappy with Microsoft's Word .
In conclusion, there are several good solutions on the market, with different purposes and prices. The big question seems to be how much you're willing to invest, in terms of time and money, to avoid using Microsoft's Word. In my case, because I know that the other options are much more mission-oriented tools, I only use Word as a last alternative.
In search of a bulletin board for the blog
Comparison between the main community management and chat applications aimed at the corporate market. The mission is to avoid Whatsapp at all costs.
To improve communication with my students, I always looked for a simple tool. The main goal was to avoid the ubiquitous Whatsapp , as I understand it is important to separate personal and professional communication. Incredible as it may seem, this can currently be considered an ambitious goal.
In addition, he was looking for a form of communication in the style of an open forum, not of private contact with each of the students. What I wanted to do with this was to have a very simple bulletin board, so that I could record where I stopped and what the schedule of the next class would be.
That is, I wanted to create a digital class journal.
I also wanted to make it possible for the public to be accessible, because I know that the need for authentication for reading ends up being a huge barrier. As I already had a blog, I was looking for a more agile communication than a normal post, more along the lines of a chat. Finally, I wanted it to be a free solution.
My option ended up being the Gitter , which is a fairly simple community management platform. While Gitter doesn't define its audience as programmers, it's pretty clear that it's about community management for these professionals. Either way, there's nothing stopping us from taking advantage of the wonderful tools that developers create for you.
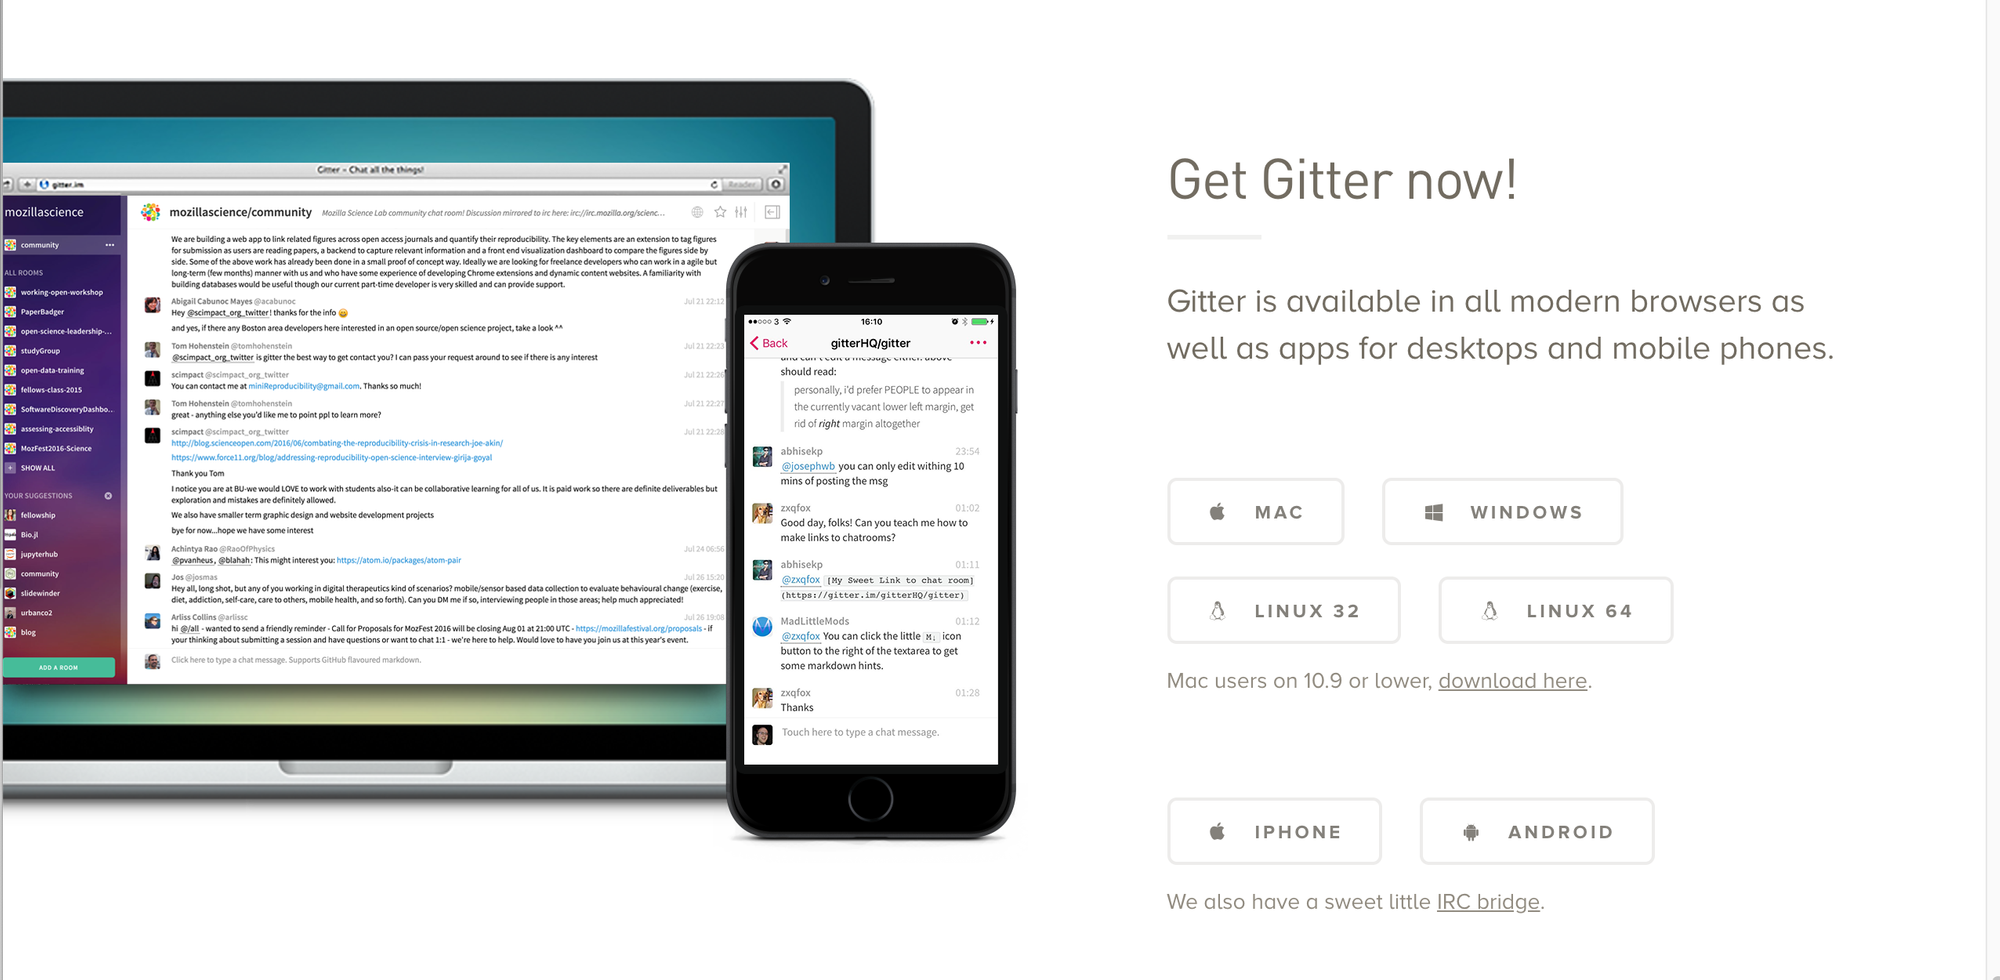
To get an idea of the importance of this platform, Gitter was bought by GitLab in 2017, when it already had more than 800 thousand users. Since then, it has been an open source project and without any limitation of use. This is because Gitter is no longer a company with a commercial purpose and has become GitLab's arm focused on developing communities that strengthen its position in the market (repository management for developers).
But this is not so relevant to us, other than for the fact that everything leads us to believe that Gitter is indeed a solid option and that it will not be discontinued. Speaking of options, some solutions are worth mentioning, if only to clarify how they differ from Gitter .
Among the alternatives is the Slack , a gigantic company, with daily activity of more than 12 million users. It is not, therefore, a niche option, but an alternative to communication for the world of work as a whole. In addition, its mission is internal communication between teams, not community management.
This field of generic solutions for the world of work seems to be quite congested, with multiple - and great - options, which would be a good subject for another post. Here I am restricting myself to comparing solutions to my concrete problem, which is the management of my communities. That is, the management of my classrooms.
Although it has had relative success in communicating with students via Slack and, more recently, via Discord , I ended up deciding to build a lighter and more open forum , which could be presented within the page of each course I teach. I was happy with the result and I hope it works better than my previous attempts, because I ended up realizing that I wasn't using the best tools for the mission.
The icing on the cake is that, precisely because it is a community in the world of technology, the development of Gitter is very agile and focused on integrations in different ways. In this case, I chose to use an integration called Sidecar , which allows you to display Gitter directly on the blog. The result is as follows:
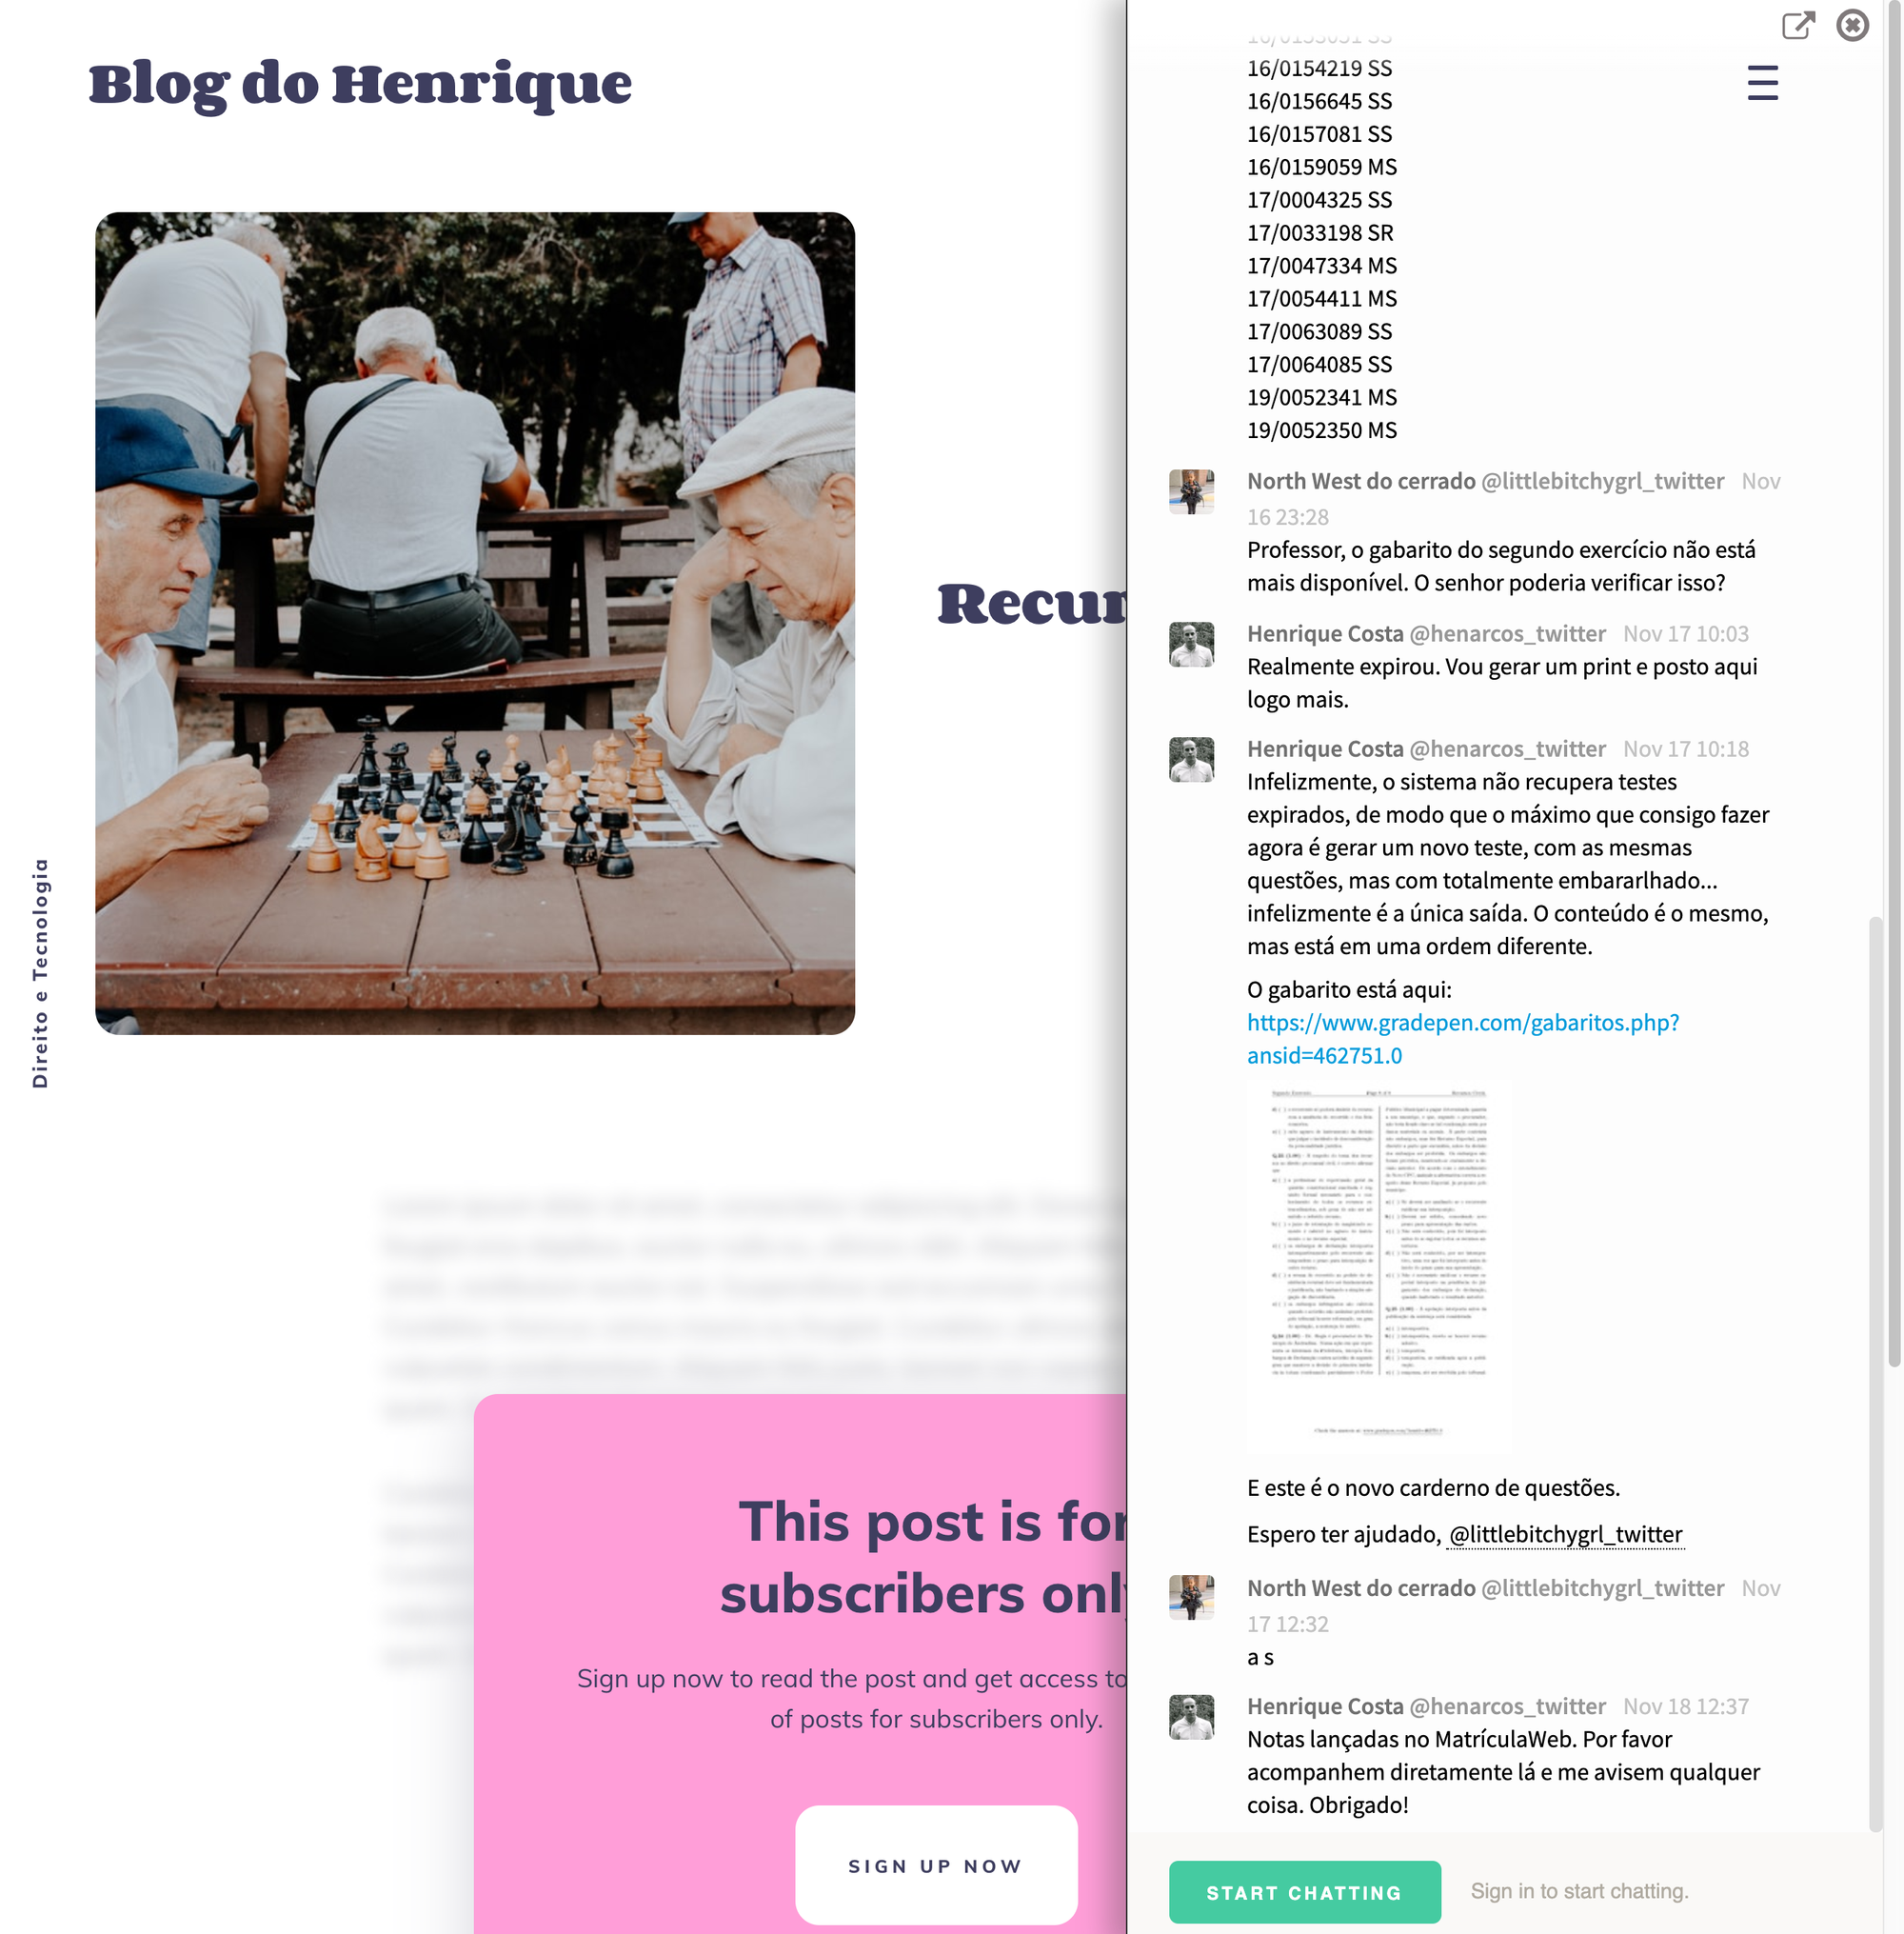
No more Whatsapp, no more Facebook Pages. 😅
In fact, I know that these solutions will continue to exist and that many students will be informed, second-hand, by posts propagated in those communities. The important thing for me is that I will be able to maintain organized and accessible communication, which I was having difficulty accomplishing through more complex tools.
Henrique Costa 
It is quite common to hear teachers saying that the worst part of the profession is correcting tests. But how do they prepare for this activity?
For me there are two alternatives: either you invest time in preparation and then you have a good correction; or you will have a real nightmare during this process.
In recent years, due to the type of discipline I started teaching and also due to the large number of students enrolled in the classes of the Faculty of Law of UnB, I decided to invest in the preparation of objective tests. I really think it was a good decision and that I learned to create tests that evaluate well the progress of each student throughout the course.
I have already published one post previously, explaining how I elaborate and organize the questions. In summary, I use the Bear for this, because it has the best hierarchical tag organization system I know. It is, in fact, a generic note-taking application, currently only available for Mac. If you are a Windows user, you may be able to solve your problem, for example, with OneNote.
Going back to the subject, let's say, for example, that I have prepared a test with objective questions, either in Bear, or in another text editor with less organizational capacity. Still, it would be necessary to edit and print this proof, which would possibly be done in Word.
So far, nothing new. But how could correction be made?
That's where a series of applications come in, whose mission is simply to generate an answer sheet for correcting objective questions through your cell phone. There are several options for this and most of them are free, if you just want to generate the answer sheet.
But that's not enough for me and I'd rather pay (a few cents per race) and have a number of advantages. My choice is the Gradepen , a Brazilian application that also shuffles the questions, generates the test for printing, hosts the answer on the internet and allows its correction by cell phone.
If you prefer another national tool with a more comprehensive purpose, it is worth taking a look at the Easy Proof or in the Quick Proof . I would say that both are more like an assessment automation platform than an exam generator. In other words, they include the possibility of applying tests in electronic media and, in the case of Prova Fácil, the entire management of the application of the test in several rooms.
Without a doubt, Prova Fácil and Prova Rápida are more complete and even cheaper than Gradepen. Nevertheless as I don't need the features offered by them, my choice is for Gradepen . In addition, I like to support independent developers, who develop software for small market solutions.
Among the foreign options, I would consider the QuickKey or ZipGrade or the Gradecam . I would not, however, consider the Lightning Grader Not even the Scantron , as they are much more expensive and compete exclusively in the corporate market. The following video illustrates how one of these options works:
Still as for my option, which is the GradePen, It is necessary to recognize that not everything is rosy . The development of the application has not been showing much breath and the user experience is not the best. The software has a very old-fashioned look. But if you just need to shuffle a few questions and correct everything on your phone, it's much more than enough.
With this strategy, I started to prepare and correct the tests with great agility. In addition, because I started to manage a very large base of questions, I started to have no problem in performing several exercises and allowing students to take the question book home. In other words, the cost of preparing a test has decreased considerably.
Thus, I believe that the planning and execution of evaluations became much more aligned with teaching activities. In this way, the course tends to become more predictable and more dynamic. And I am happier, because I spend my time preparing the questions, not correcting them .
On the other hand, I recognize that some disciplines are incompatible with evaluation by objective questions. But I also think that, with some effort, the teacher can learn to formulate objective questions in a more interesting way, which will reduce this limitation.
Finally, an additional positive point is that, in my case, I started to learn more about the content, which helps me to be a better teacher . In my view, this way of working can inaugurate a virtuous circle. For this it is only necessary that the teacher dedicates himself more to preparing than to correcting the tests, which seems to me to be a much smarter option.